This quick tutorial will get you started on customizing Scrivener’s Outline Mode to better suit your needs.
Below is the outline view of a basic novel template (I’d like to give credit where credit’s due, but I can’t recall where it came from and I didn’t see any signatures… Sorry Anonymous.) At first glance, the outline mode in Scrivener leaves a lot to be desired. But it doesn’t have to remain so.
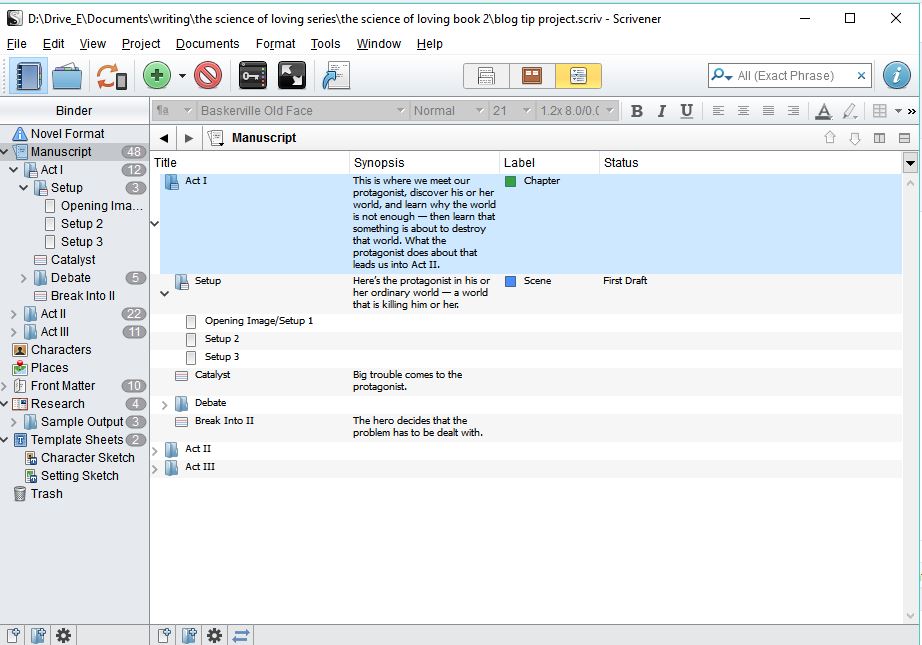 The Title and Synopsis fields are generated from the Binder’s file names and the synopsis data entered into the Inspector pane or Index Cards. Additional, pre-formatted columns, such as project targets, word count and status can be selected by going to View>>>>>Outline Columns.
But you are not limited to these choices.
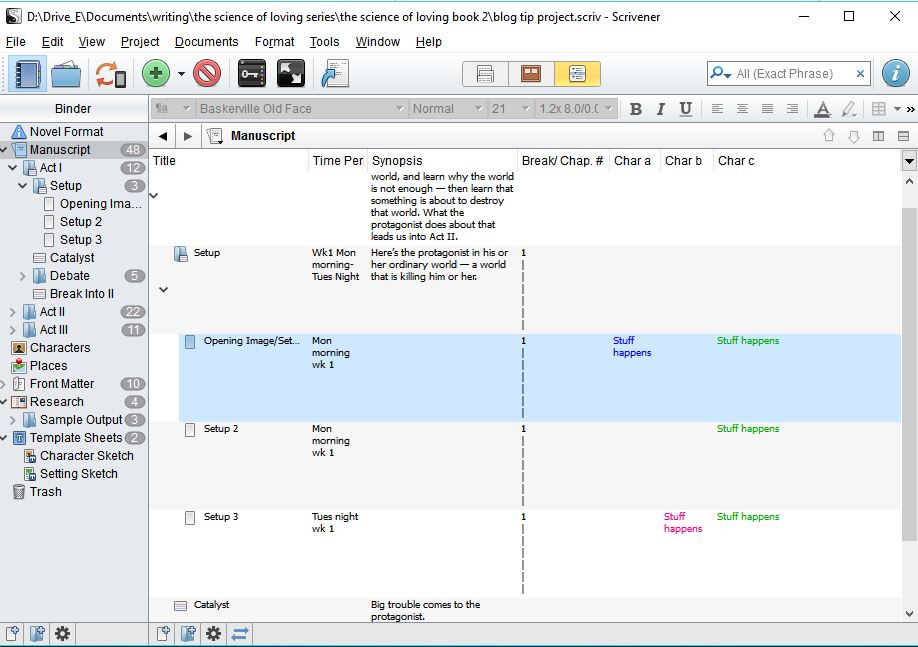
In addition to the main story arc, I like to track each character’s story arc separately, but this trick will work just as well if you have multiple events occurring simultaneously, or to ensure important facts remain consistent… Because it’s annoying as fuck when a dead offstage character is suddenly alive but estranged or something mentioned chapter 3, doesn’t happen until chapter 5 (unless we’re dealing with time travel or psychics, even then, your facts shouldn’t change without reason.)
To add additional columns go to:
Project>>>Meta-Data settings>>>>>Custom Meta-Data tab

Add custom fields using the Plus sign in the bottom left. I normally like to use word wrap so I can see all the text. I also color code POV so I don’t lose sight of who’s voice I’m writing.

Once you’ve entered the columns you currently want, you can add them to your layout by selecting them in View>>>>>Outline Columns
Lastly, once you’re satisfied you might want to create a custom layout for future use by going to Window>>>>>Layouts>>>>Layout Manager>>>>New Layout.
Please feel free to share your own tips in the comments below.
ttfn
